

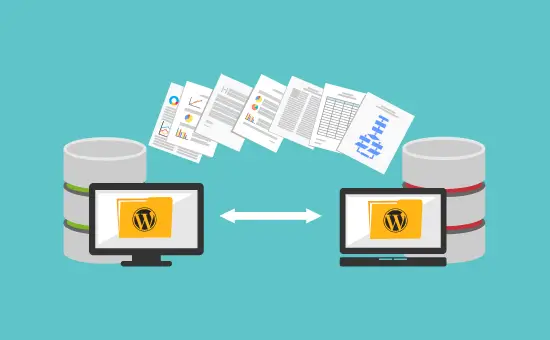
To move a WordPress site to another host, back up your files and database, set up the new host with your WordPress environment, upload your files via FTP, and import the database. Update the wp-config.php file with the new database credentials, point your domain to the new host, and test the site thoroughly. Use tools like plugins for an easier migration or do it manually for full control.
Moving a WordPress site to a new host can feel daunting, but I promise it’s not as hard as it seems. I’ve done it multiple times—sometimes successfully, sometimes with hiccups.
Each time, I learned something new, and I’m here to share a clear, step-by-step guide. Whether you prefer plugins or manual methods, I’ll walk you through the process like a trusted friend.
Why Move Your WordPress Site?
Sometimes, you just outgrow your current host. Maybe the performance isn’t cutting it, or you’ve found a better deal elsewhere.
For me, it was about getting better customer support and faster page load times. Whatever your reason, moving a WordPress site can breathe new life into your website.
How to Migrate WordPress Site to New Host
1. Backup Your WordPress Site (Files + Database)
Before you start the migration, take a deep breath. The first thing you’ll need to do is backup everything. Trust me on this, you don’t want to lose any files, themes, or settings during the migration process. There are several ways to do this:
- Manual Backup: You can use FTP to download your WordPress files and then export your database using phpMyAdmin.
- Backup Plugins: Tools like UpdraftPlus or All-in-One WP Migration make this process a lot easier if you’re not comfortable with the technical side of things.
Pro Tip: Always test your backup. It’s worth the extra time to ensure everything works properly.
2. Install WordPress on the New Host
Once you’ve backed everything up, the next step is installing a fresh copy of WordPress on your new hosting account. Most hosting providers, like Hostinger or Bluehost, offer a one-click WordPress installation feature. This makes it super easy to get started.
If your host doesn’t offer that, you can always install WordPress manually, but that’s a topic for another day.
3. Upload Your WordPress Files
Now that WordPress is up and running on your new host, it’s time to upload your files. Use FTP to transfer your website files from your old host to the new one.
This includes your wp-content folder, themes, plugins, and uploads. You’ll want to overwrite the default WordPress files with your own, which is where your backups come in handy.
Pro Tip: If you’re unsure about this step, you can always ask your host’s support team for guidance or use the built-in file manager in your hosting control panel (cPanel).
4. Export and Import Your Database
This is the trickiest part, but don’t worry, I’ve got you covered. You need to export your database from the old host and import it into the new one. Here’s how you can do it:
- Export the Database: Go to phpMyAdmin on your old host, select your WordPress database, and click Export.
- Import to the New Host: On your new host, open phpMyAdmin again and create a new database. Then, import your old database into this new one.
5. Update wp-config.php File
Now comes the crucial step of configuring your new host’s database. In the wp-config.php file, you need to update the following lines with your new database name, username, and password:
define('DB_NAME', 'new_database_name');
define('DB_USER', 'new_database_user');
define('DB_PASSWORD', 'new_database_password');
define('DB_HOST', 'localhost');
This is where your new host’s database information comes in handy, so ensure you get the details right.
6. Update Domain Settings (If Necessary)
If you’re also changing domains, this step is a must. You must update your domain’s DNS settings to point to your new host. You can do this through your domain registrar’s control panel.
Pro Tip: DNS changes can take up to 48 hours to propagate fully. Be patient.
Can I Use a Plugin to Migrate My WordPress Site?
Yes, you absolutely can! If you’re not keen on dealing with FTP, phpMyAdmin, and all the technical steps, a plugin like All-in-One WP Migration or Duplicator can save you a lot of hassle.
These plugins automate the entire migration process, making it as easy as clicking a few buttons. Simply install the plugin, follow the prompts, and you’re done.
Pro Tip: While plugins are incredibly convenient, they might not work as smoothly with large sites. Always test on a smaller site first if you’re unsure.
Migrating WordPress Without a Plugin: The Manual Way
If you prefer to go the manual route without using a plugin, that’s totally fine. In fact, some people argue that doing it manually gives you more control over the migration. While it’s a bit more involved, it also teaches you how everything works behind the scenes.
Common Issues to Watch Out For During Migration
Even though moving your WordPress site to a new host is relatively simple, there are a few common issues you might encounter:
- Broken Links: After migration, some links might not work properly. You can fix this by running a plugin like Velvet Blues Update URLs.
- Missing Media Files: Sometimes, images and other media don’t show up after migration. Check your file paths and make sure everything transferred correctly.
- Permissions Issues: Occasionally, file permissions may not transfer correctly. Make sure you check the permissions on the new server.
Is It a Good Decision To Move My WordPress Site to Hostinger?
Yes, you can move your WordPress site to Hostinger, and it’s a great choice if you’re looking for reliable and budget-friendly hosting. Hostinger even offers tools to simplify the migration process.
Whether you prefer a manual migration, using Hostinger’s built-in migrator, or a plugin, you can successfully move your site without losing any data or functionality.
Let me walk you through the steps to make it happen.
How to Move Your WordPress Site to Hostinger
Method 1: Using Hostinger’s Free WordPress Migration Tool
Hostinger provides a WordPress Migrator Plugin that automates the transfer. This is the easiest method for beginners. Here’s how to do it:
- Log in to Hostinger: After signing up for a Hostinger account, log in to your hPanel (Hostinger’s control panel).
- Find the Migration Tool: Navigate to the Website section in hPanel and select Migrate Website.
- Install the Plugin on Your Current Site: Install the Hostinger Migrator Plugin from the WordPress plugin repository on your current WordPress site.
- Start the Migration:
- Open the plugin on your current site and copy the token provided by Hostinger’s migration tool. Enter this token in the plugin to start the migration.
- Wait for Completion: The plugin will transfer your files, database, and settings. Once it’s done, you’ll get a confirmation email.
Method 2: Manual Migration to Hostinger
You can manually migrate your site if you prefer a more hands-on approach. Here’s the step-by-step guide:
- Backup Your Current Site:
- Use an FTP client (like FileZilla) to download all your website files, including the wp-content folder.
- Export your database via phpMyAdmin.
- Set Up WordPress on Hostinger: Use Hostinger’s 1-click WordPress Installer in hPanel to set up a fresh WordPress site.
- Upload Your Files: Use the File Manager in Hostinger’s hPanel or an FTP client to upload your WordPress files to the new server.
- Import Your Database: Go to phpMyAdmin in hPanel and import the database backup from your old host.
- Update wp-config.php: Edit the wp-config.php file using the new database details provided by Hostinger.
- Point Your Domain to Hostinger: Update your DNS settings to point to Hostinger’s nameservers:
ns1.dns-parking.comns2.dns-parking.com
- Test Your Site: Once the DNS changes propagate (usually within 24-48 hours), visit your site to ensure everything works.
Method 3: Using a Plugin Like All-in-One WP Migration
If you’d rather use a third-party plugin, All-in-One WP Migration is a popular option:
- Install the plugin on your old WordPress site.
- Export your site’s files and database.
- Set up WordPress on Hostinger.
- Install the same plugin on the new site.
- Import the file you exported earlier.
Why Move to Hostinger?
Hostinger offers excellent performance, competitive pricing, and features like:
- Free SSL Certificates.
- 24/7 Customer Support.
- WordPress-optimized hosting.
- A user-friendly control panel (hPanel).
- Free daily/ weekly backups.
Moving your WordPress site to Hostinger is smart if you’re looking for better performance or a more affordable hosting solution.
Here is my affiliate link for Hostinger, if you purchase your hosting from this link, you will get 20% off on the hosting plan, and I will get a small percentage of your purchase at no extra cost to you.
Frequently Asked Questions And Answers
- Can I migrate my WordPress site for free?
Yes, you can migrate your WordPress site for free using plugins like Migrate Guru or manually. These methods allow you to transfer your site without incurring additional costs.
2. How long does a WordPress migration take?
The duration of a WordPress migration depends on your site’s size and the method used. Plugin-based migrations can take as little as 30 minutes, while manual processes may require several hours.
3. Will migrating my WordPress site affect its SEO rankings?
If done correctly, migrating your WordPress site should not negatively impact your SEO rankings. Setting up proper redirects, maintaining the same URL structure, and informing search engines of the change is crucial to preserving your site’s SEO performance.
4. How can I minimize downtime during the migration process?
To minimize downtime, plan the migration during off-peak hours, use a reliable migration plugin or service, and update DNS settings promptly. Additionally, consider setting up a maintenance page to inform visitors during the transition.
5. How do I handle email accounts when migrating to a new host?
When migrating to a new host, you’ll need to recreate your email accounts on the new server. Ensure you back up all important emails and configure the new email accounts to match the previous settings to prevent any disruption in email services.
Final Thoughts: Is It Worth Moving to a New Host?
Moving your WordPress site to a new host ultimately boils down to your needs and goals. Whether you’re moving to a cheaper option, better performance, or more flexibility, the migration process is manageable with the right tools.
I’ve been through this process myself, and it’s become second nature after a couple of moves. If you follow the steps and use the right resources, you’ll be up and running on your new host without any significant issues.
So, take your time, back everything up, and follow the steps carefully. And remember, whether you’re using plugins or doing it manually, migrating your WordPress site doesn’t have to be a headache.


